January 4, 2021
How to host a channel on Twitch (A Step by Step Guide)
Table of Contents
Host channels automatically
To host a twitch channel automatically whenever you’re offline. You have to create an auto host list.
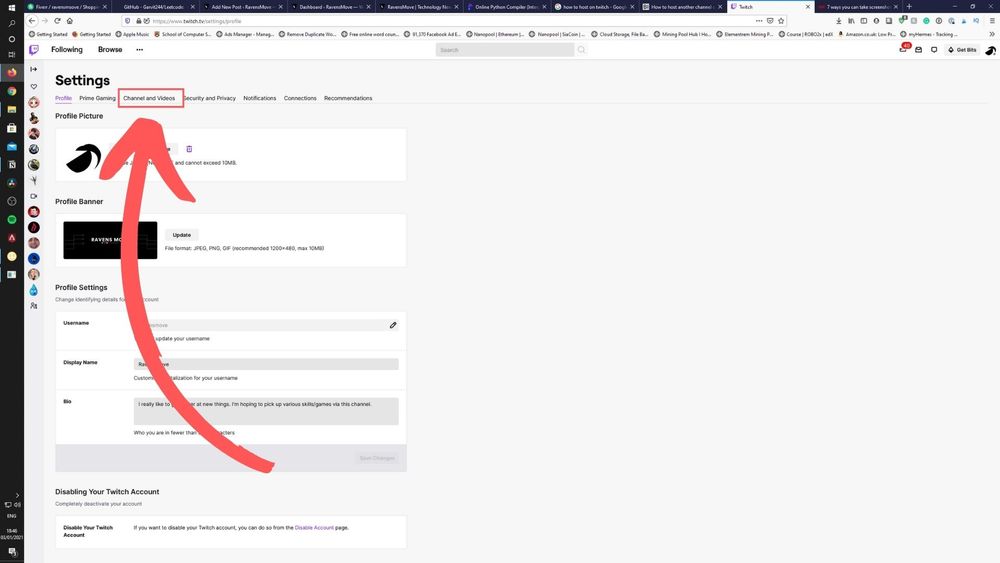
- From your Twitch account, click on your “Profile Picture” in the upper-right corner of the screen.
- Next, click “Settings.”
- In the settings menu, click the “Channel and Videos” option.
- Scroll down to “Auto Hosting”.
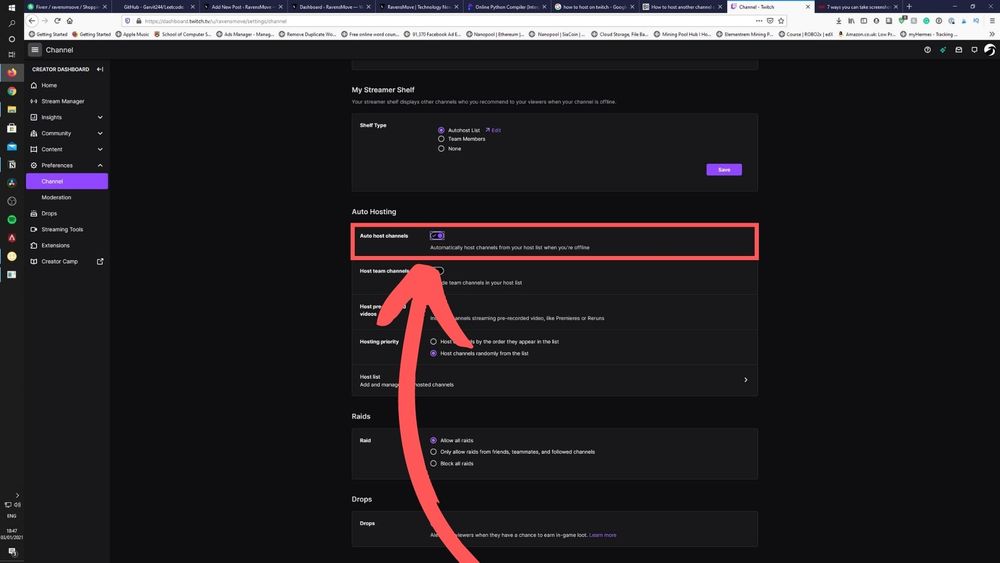
- Enable the “Auto host channels” toggle by clicking it.
- Then, click the “Host List” option at the bottom.
- This will open a new page where you can add channels to the auto-host list.
- Search for the channels and click the “Add” button.
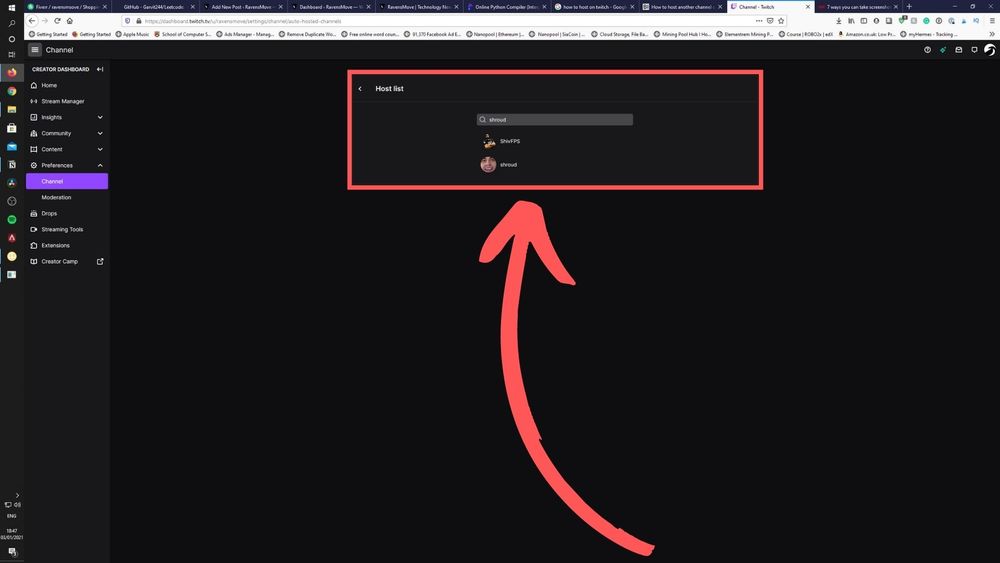
Currently, there’s no limit to how many channels you can put on this list.
Host channels manually
- Once again, from your Twitch account, click on your “Profile Picture” in the upper-right corner of the screen.
- Click on “Channel” in the drop-down menu
- On the right side of your screen, there will be a “chat section”. Click on the field that says “Send a message.”
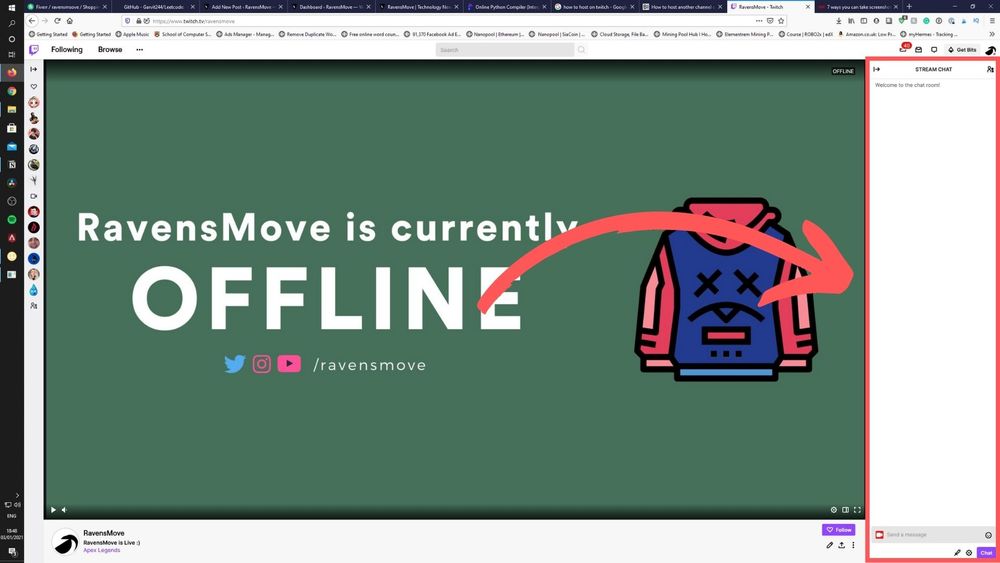
- Type
/host < username >– use the username of the channel you want to host instead of< username >. e.g /host shivfps
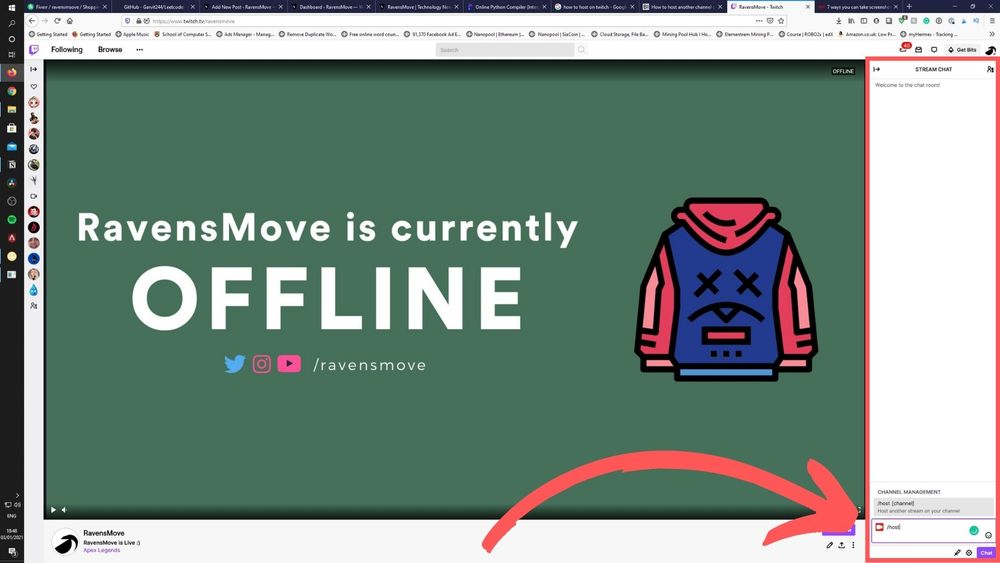
- Send your message, after writing the command correctly.
- To stop hosting that Twitch channel, type “/unhost” into the chat field.
NOTE: Twitch allows you to use only three host commands per hour. For example – if you start hosting a channel, then unhost that channel and start hosting another channel within the same hour. You’ll have to wait for an hour to use host commands again.